GIF encoding
14 Aug 2022
Last updated
Okay! It’s now time to understand how GIF actually works, at least in the contest of a library like javascript.
This article will particularly be focused on the decisions I made while adding this functionality to the tool, which may not be the best, but it’s mostly a journey through what I discovered and learned.
I will try to explain the whole process from beginning to end of what it takes to create a GIF out of any given animation.
Table of contents
GIF files: a bit of story and terms
So first: we gotta understand what is a GIF. We are all familiar with how it’s used (mainly for memes at this point) and how it works: it’s a piece of short video with no audio and with a very particular and rather crunchy look and feel.
Essentially, the GIF specification defines GIF as a standard way of lossless, palette based image compression. And initially, it didn’t even support animation, but they implemented it very early, so it’s almost always been a type of animation file.
Fun fact: the GIF latest release (version 89a) that we know and love was published in 1989 (33 years ago at this point).
Let’s review some of the mentioned features real quick.
Lossless
On the one hand, lossless means that the compressed data will be exactly preserved in the encoding and decoding stages, as opposed to lossy formats which will deliberately remove information in order to make files smaller. I am looking at you, JPEG.
Palettes
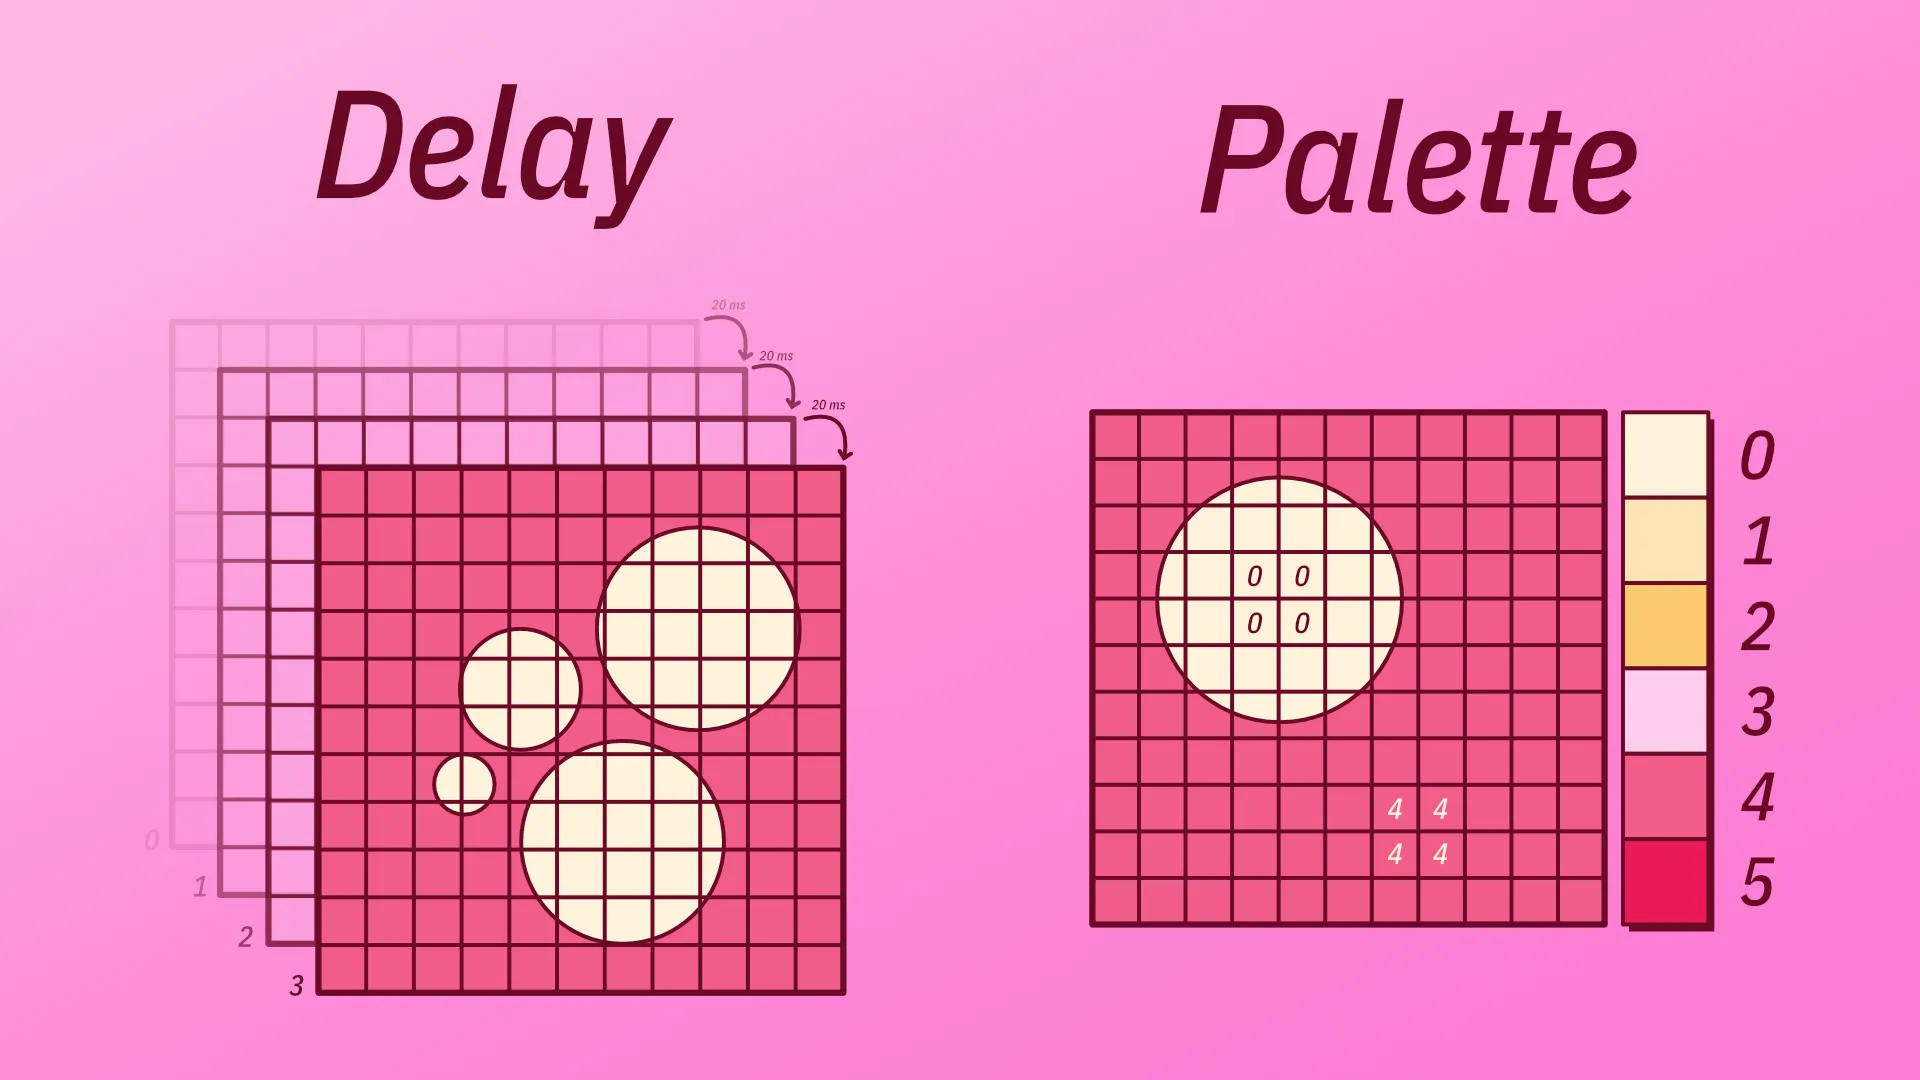
On the other hand, palette based means that the encoder will not save every color individually but rather generate a static palette of colors for each frame that we’ll keep referencing for every pixel in that frame. This constrains the color space to whatever this palette allows us to play with. And, in the GIF specification, that constrain is pretty tight since we only have 256 colors.
We can have a particular palette for each frame, or we can have what’s called a global palette, used generally for all frames. We’ll dive deep into this topic next.
Main functionality
Okay, so… how does it work? Very simple. As we mentioned, we’ll specify a color palette that every pixel in every frame will have to reference somehow, and specifies a delay between each frame. That’s essentially it!
Let’s dive a bit more into each aspect.
Usually, there’s a javascript library (or framework) for absolutely anything. But in this context, what we usually get is GIF encoders: libraries that make all the work of writing headers and bytes at low level… but what frames you put in, how you process and deal with them and what palette you use is up to you.

Global palettes
So, first, we have to figure out a way to generate a color palette. Color palettes MUST be the size of a power of 2 and less than or equal to 256. Pretty limited. We could simply use something like this, which tries to capture every single color as best as it can.
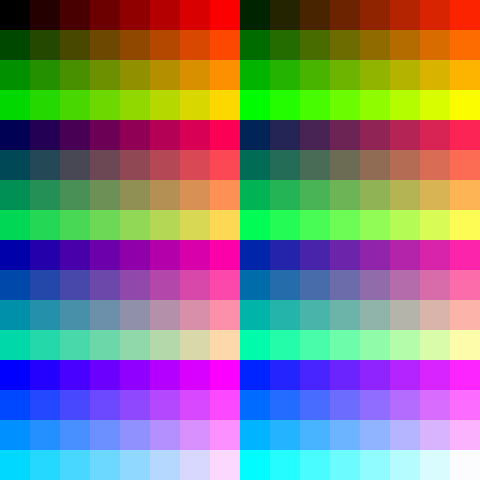
Image taken from insouris blog
But that’s lame, because this palette will work mediocrely for every gif and good for almost no case. It’s quite recommended to use your animation to generate a palette. And we are gonna do that!
How? Simple! Go through each pixel in each frame on your animation and extract the most important colors.
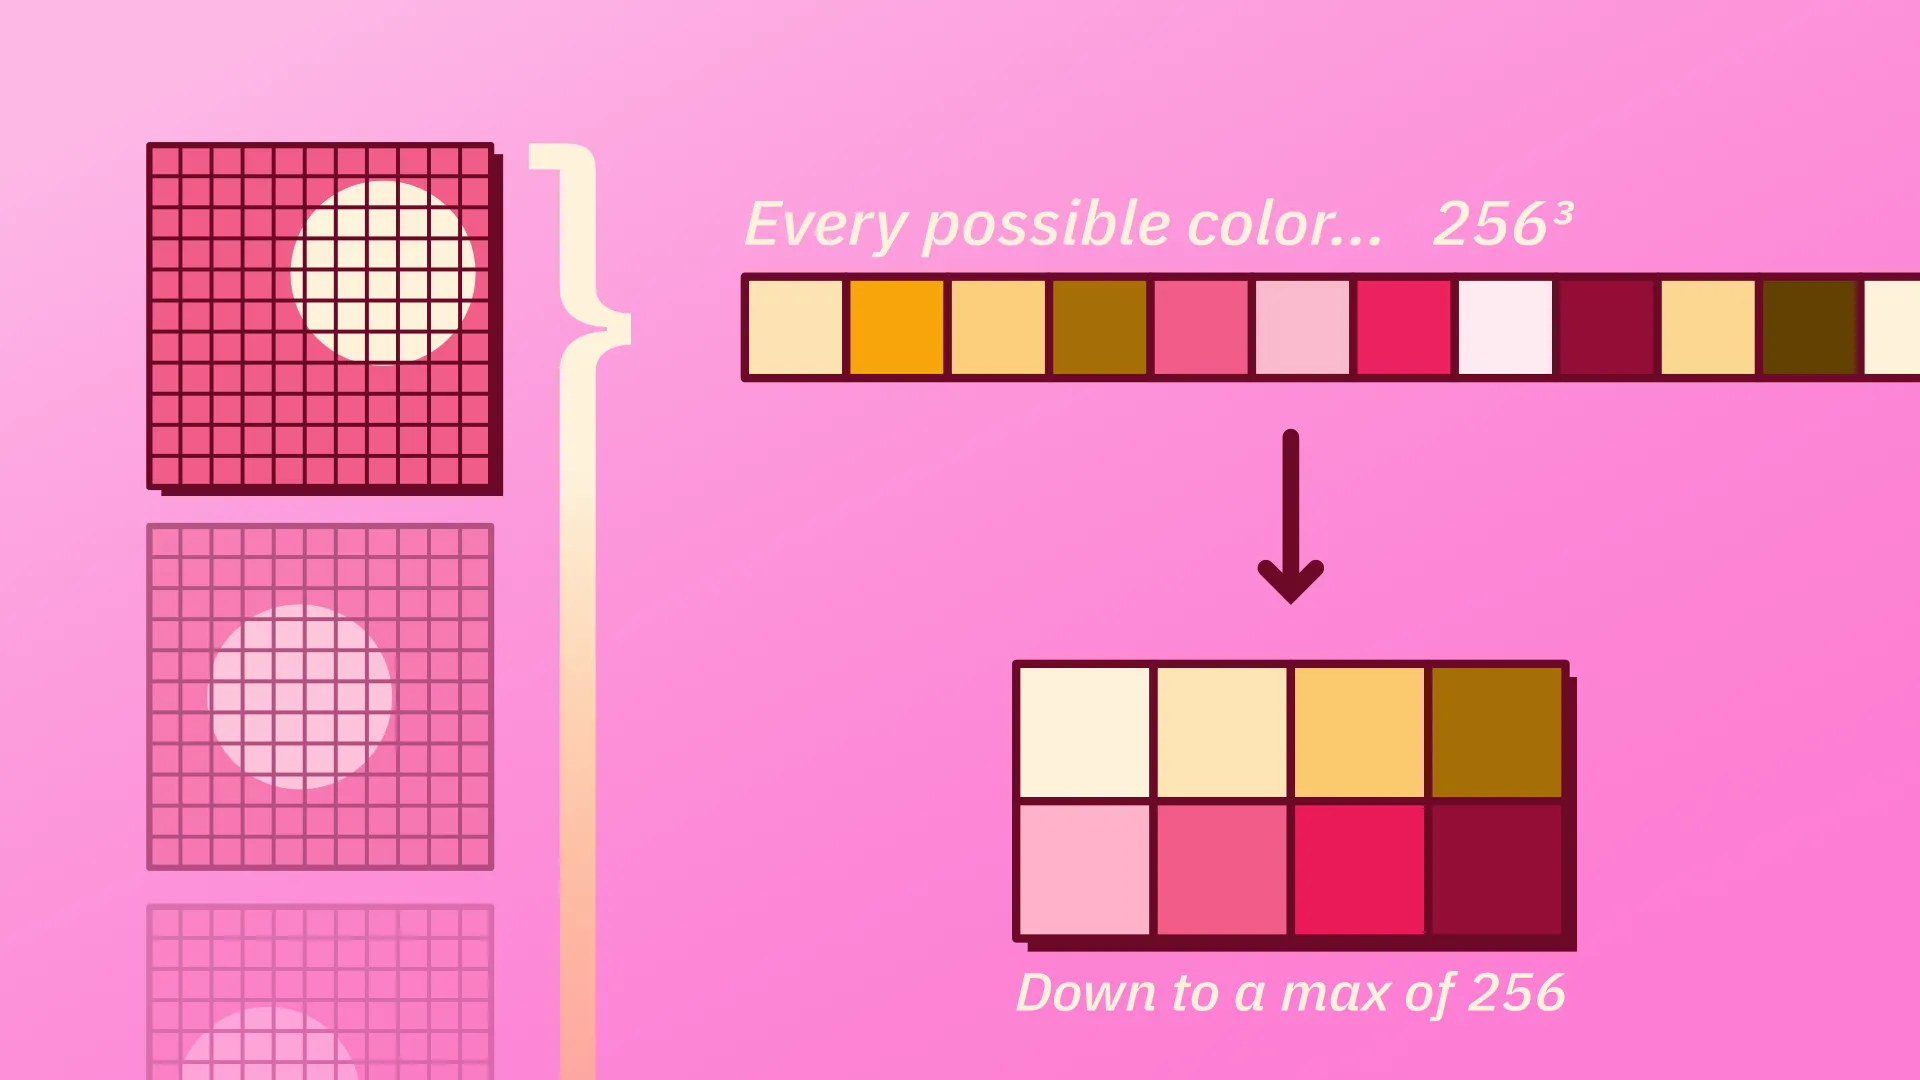
Given an animation, we can take absolutely every pixel and quantize this color space. Quantization is a fancy term for “summing up”, we want to take the most important colors in this space.
More specifically, this technique tries to shrink the space of 16M+ colors (8 bit) down to a palette with less colors, in our case, 256 or less, while trying to preserve the quality of it.
This technique is pretty involved and there are lots of simple and sophisticated ways to implement it. To get a sense of what we are talking about, let us see one of the simplest that I could find. It lies under the family of Popularity Algorithms.
Quantizing colors: Popularity algorithm
Just to be very clear, I want to reinforce what is our main goal with all this. We have a color space of more than 16M colors () and we want to find the most important colors that our particular image has. We want to find a subset of all the possible colors that best represents the colors in our image.
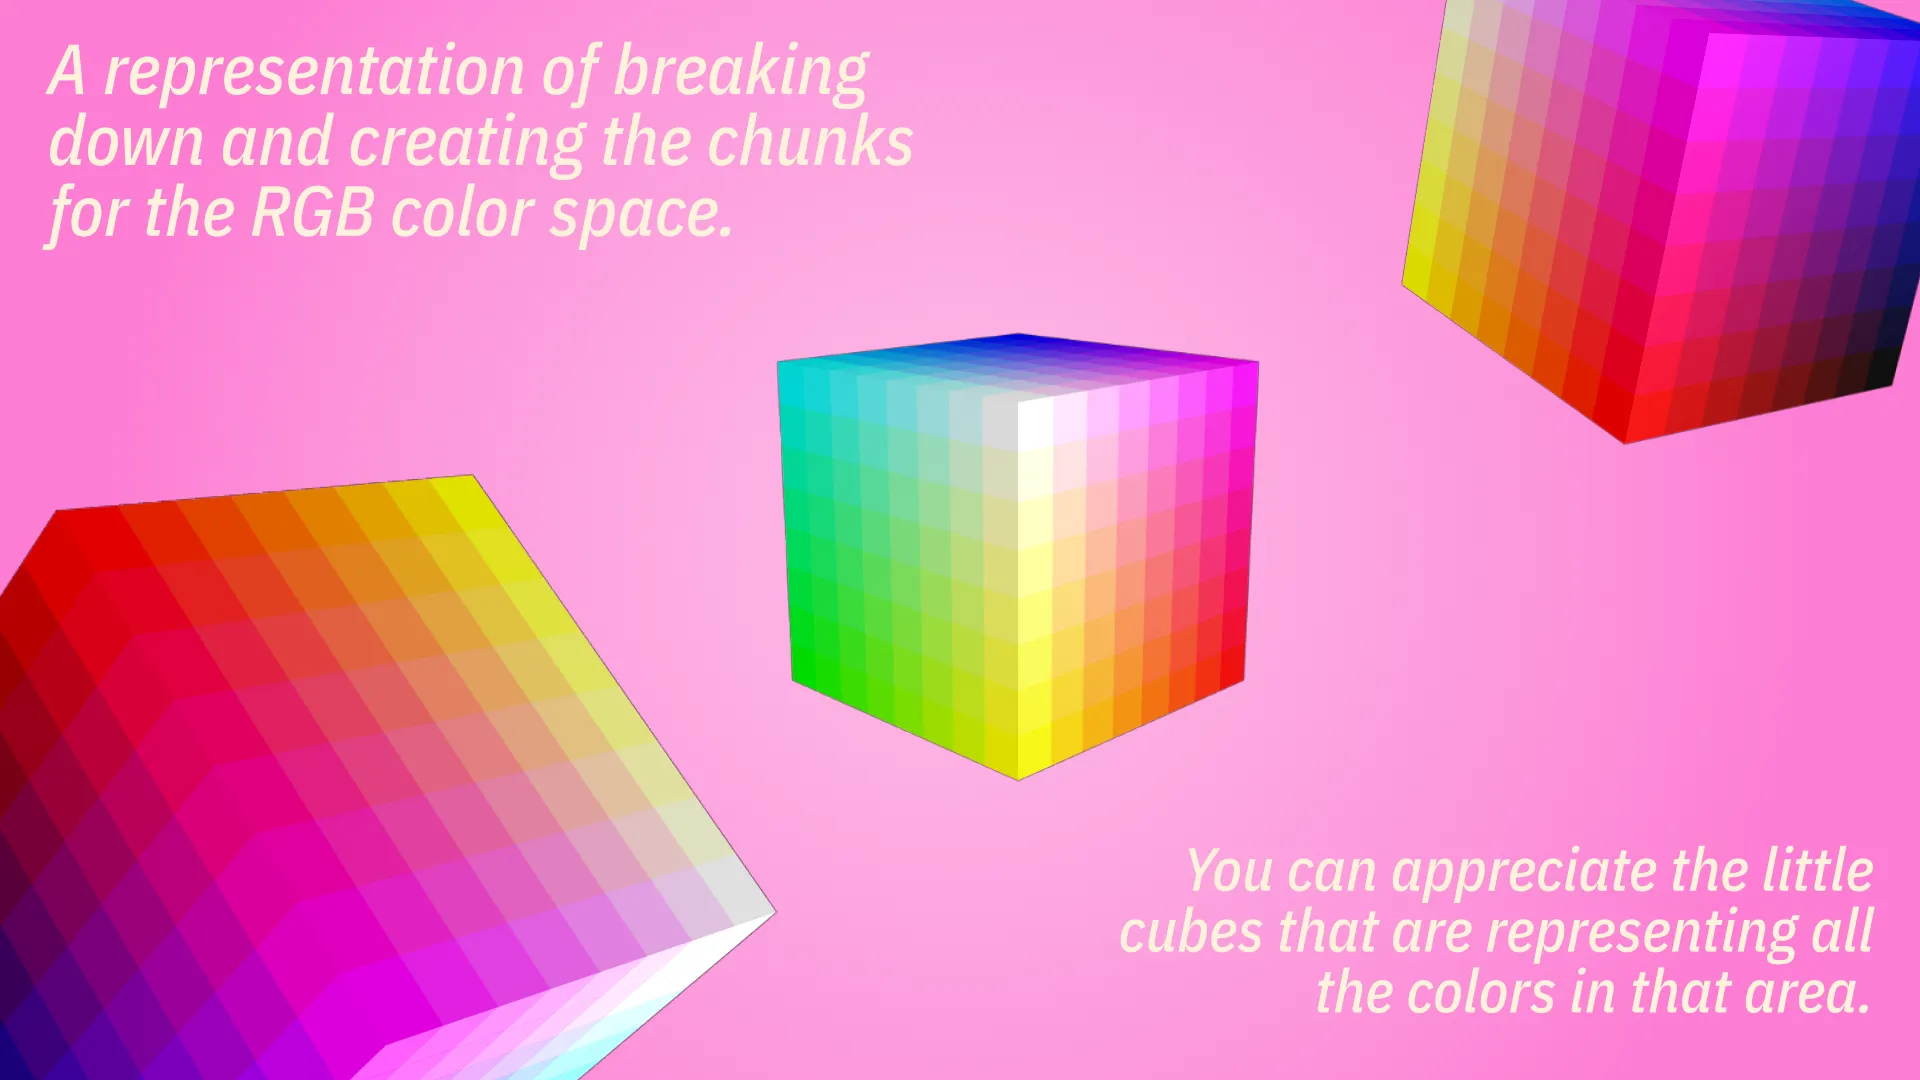
Step 1: Breaking down the color space
First, we start with our original color space, which can be very conveniently be represented as a cube in 3D space, where each axis indicates the amount of each of our components: red, green and blue.
Any point in this space will be represented by its corresponding coordinate: [234, 12, 89]. Each component in this coordinate will tell us how much red, green or blue there is in this particular point (or color).
If we do this for absolutely every possible combination, we end up with our colors, which equals to 16M+.
Now, the key part is we are going to group all this points in chunks, little cubes. For example, we could group them in little packages of , each containing 32768 colors. This already is quantizing the 16M+ space into a space of only 512 colors. This comes from , or more importantly: , meaning that we are getting an eighth of the total colors for each axis [r, g, b]. This ratio will be important next.
Step 2: Define the chunks
Now, we are going to associate each chunk with the average of all the colors it holds. That is, in our particular example, for each of the 32K colors that each chunk has, take the average of the red, green and blue channels independently. We can associate this new “average color” with our chunk in a dictionary, for example:
color_chunks[chunk] = [avg(red), avg(green), avg(blue)];We are now going to define that key chunk!
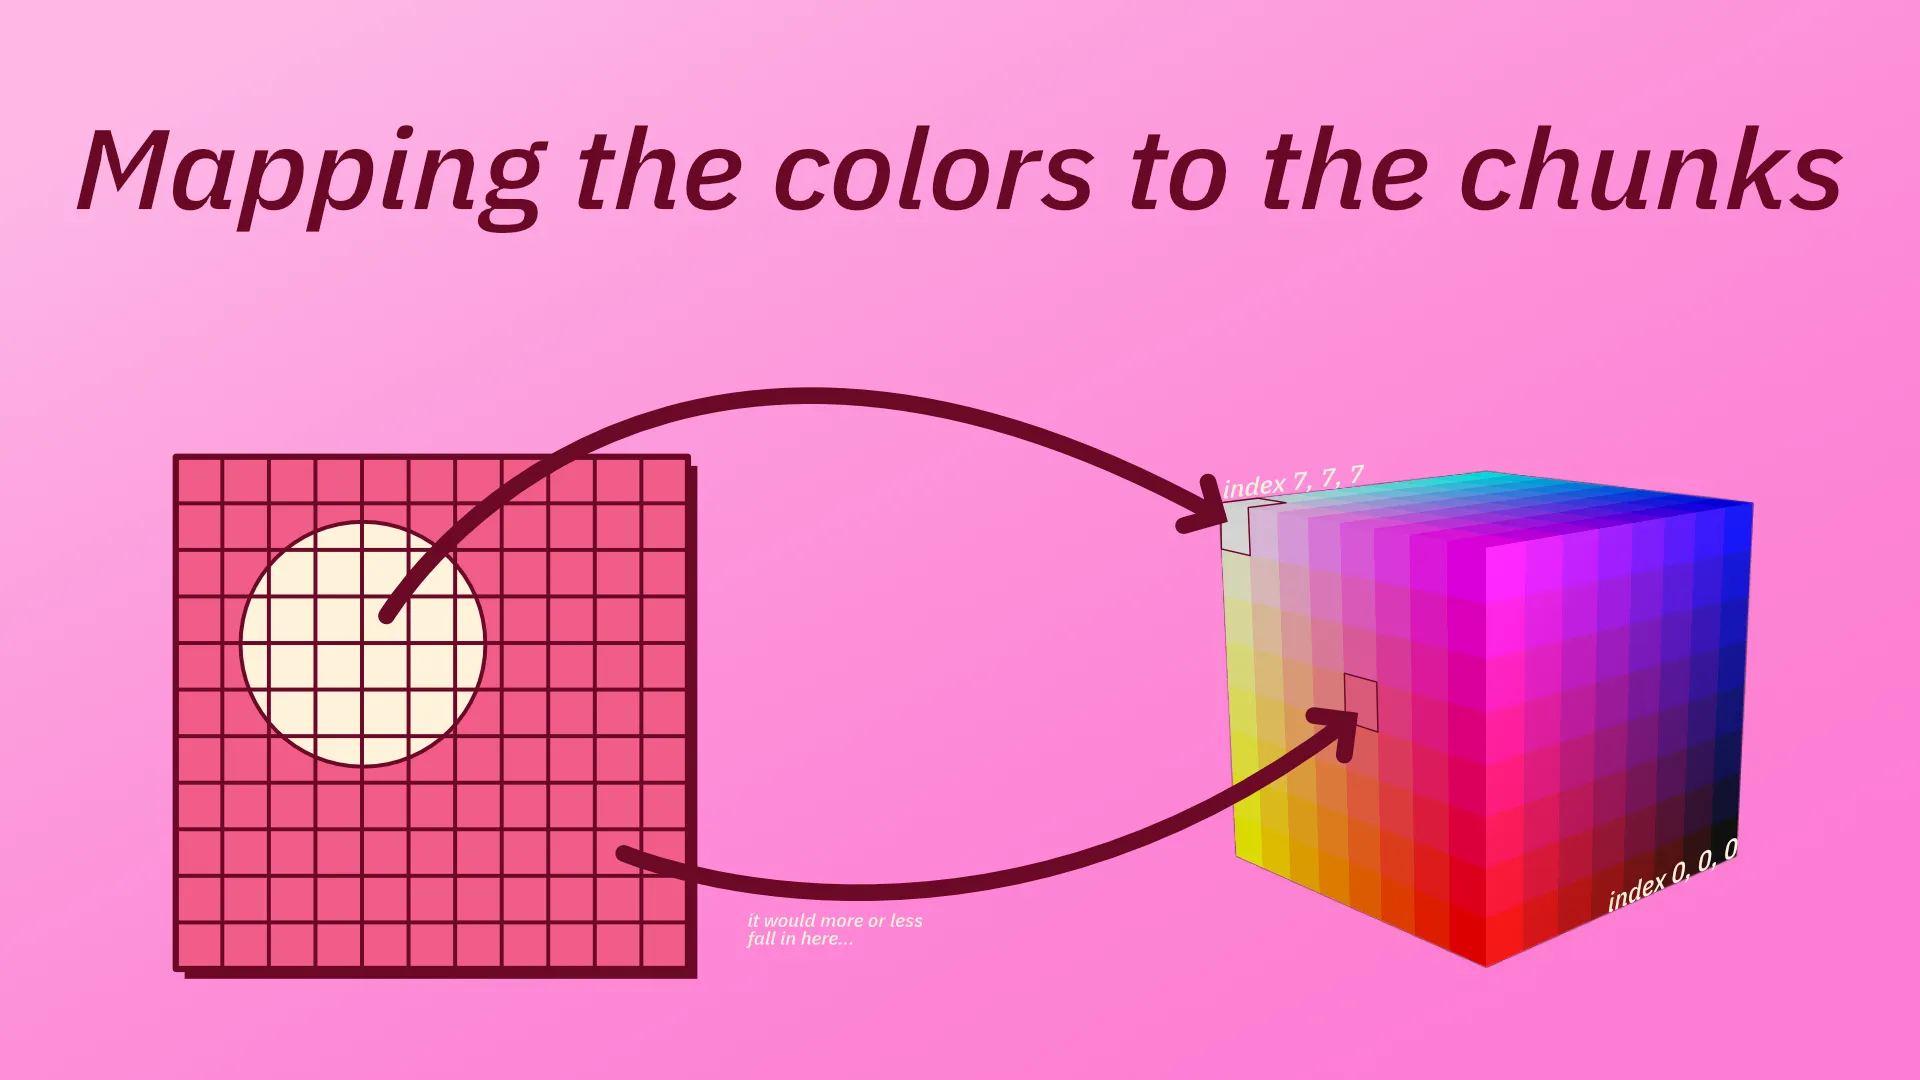
Step 3: Mapping the colors to the chunks
Having all these little packages prepared, now we are going to associate every color present in our image with the corresponding chunk it falls in. This gotta be my favourite part.
For every pixel in our image, take the color and find the chunk where it belongs. This can be done in a variety of ways, depending on the technique. One of the most intuitive follows like this.
If we assign an integer index to every one of our chunks starting from the bottom and going sequentially, we can convert that index to a coordinate by a simple change of base. For example, the little chunk that is in the position 0 would be in the new coordinate system [0,0,0].
Let us consider the same example as before, in which we sliced the space into 8, resulting in packages of colors.
- Chunk #15 is located at (0, 1, 7)
- Chunk #16 is located at (0, 2, 0)
- Chunk #53 is located at (0, 6, 5)
- Chunk #353 is located at (5, 4, 1)
- Chunk #511 is located at (7, 7, 7) (this would be the last one!)
So the key that we mentioned before is going to be our index! The dictionary would look like this, for example:
color_chunks[53] = [avg(red), avg(green), avg(blue)];Now, to get the coordinate of the chunk that the pixel in our image belongs to, we just have to divide its coordinates by our chunk size, in this case, 32.
[254 // 32, 127 // 32, 32 // 32] = [7, 3, 1] # if decimal, just floor itNow, we have 731, a number in base 8, which we can convert to base 10 to get our index:
Now, simply access color_chunks[473] and obtain our new averaged, quantized color!
TL;DR
Summing up every step very quickly:
- Get the chunk size and ratio. If we divide in n chunks, each chunk will be 256 / n long.
- For example:
ratio = 8,chunk_size = 256 / ratio
- For example:
- Get the pixel from your image and divide each component by the
chunk_size. - Treat this triplet of numbers as a number in base . Consequently, convert that number to base 10 by adding the products with the corresponding powers of your base, as you’d usually do.
- Now you got the index! Access your dictionary and that is our color!
Step 4: Rank the chunks in terms of popularity
Now that we know how to covert an RGB color from our image to the corresponding chunk it lies on, we can track a counter of how many colors are referring each chunk.
This will effectively tell us what are the most relevant chunks that better sum up our image. From there, since every chunk is actually represented by a color (the average), we retrieve the 256 most referenced, or better yet: their associated colors! This will effectively return a set of colors that we can use for our GIF.

Side note
All this information and much more can be found on this spectacular article by Steven Segenchuk: An Overview of Color Quantization Techniques
Also, this whole process, as well as applying the palette, is actually done by the gifenc library, by Matt DesLauriers, which helped me a ton in this project.
Applying a palette
Great! So now we have a color palette that’s tailored to our specific animation. Now, we need to use this palette to encode every frame.
The way we do this is by taking every pixel in one frame and checking what’s the nearest color in the palette. This is usually done via the euclidean metric, treating the color space as a cube and minimizing the distance between the target color and the palette color.
Once we have decided what color from the palette we’ll use, what we actually insert is not the color BUT the index of that color in the palette. This will result in an image of the same width and height, but with integers referencing every color in our palette.
And this very indexed frame is what we’ll put into the encoder. Neat! 
Important optionals: Transparency optimization
Encoding it this way would be absolutely fine, but GIFs are known for being extremely big files. So, making some tweaks to hopefully save some space will surely be useful. How do we do that?
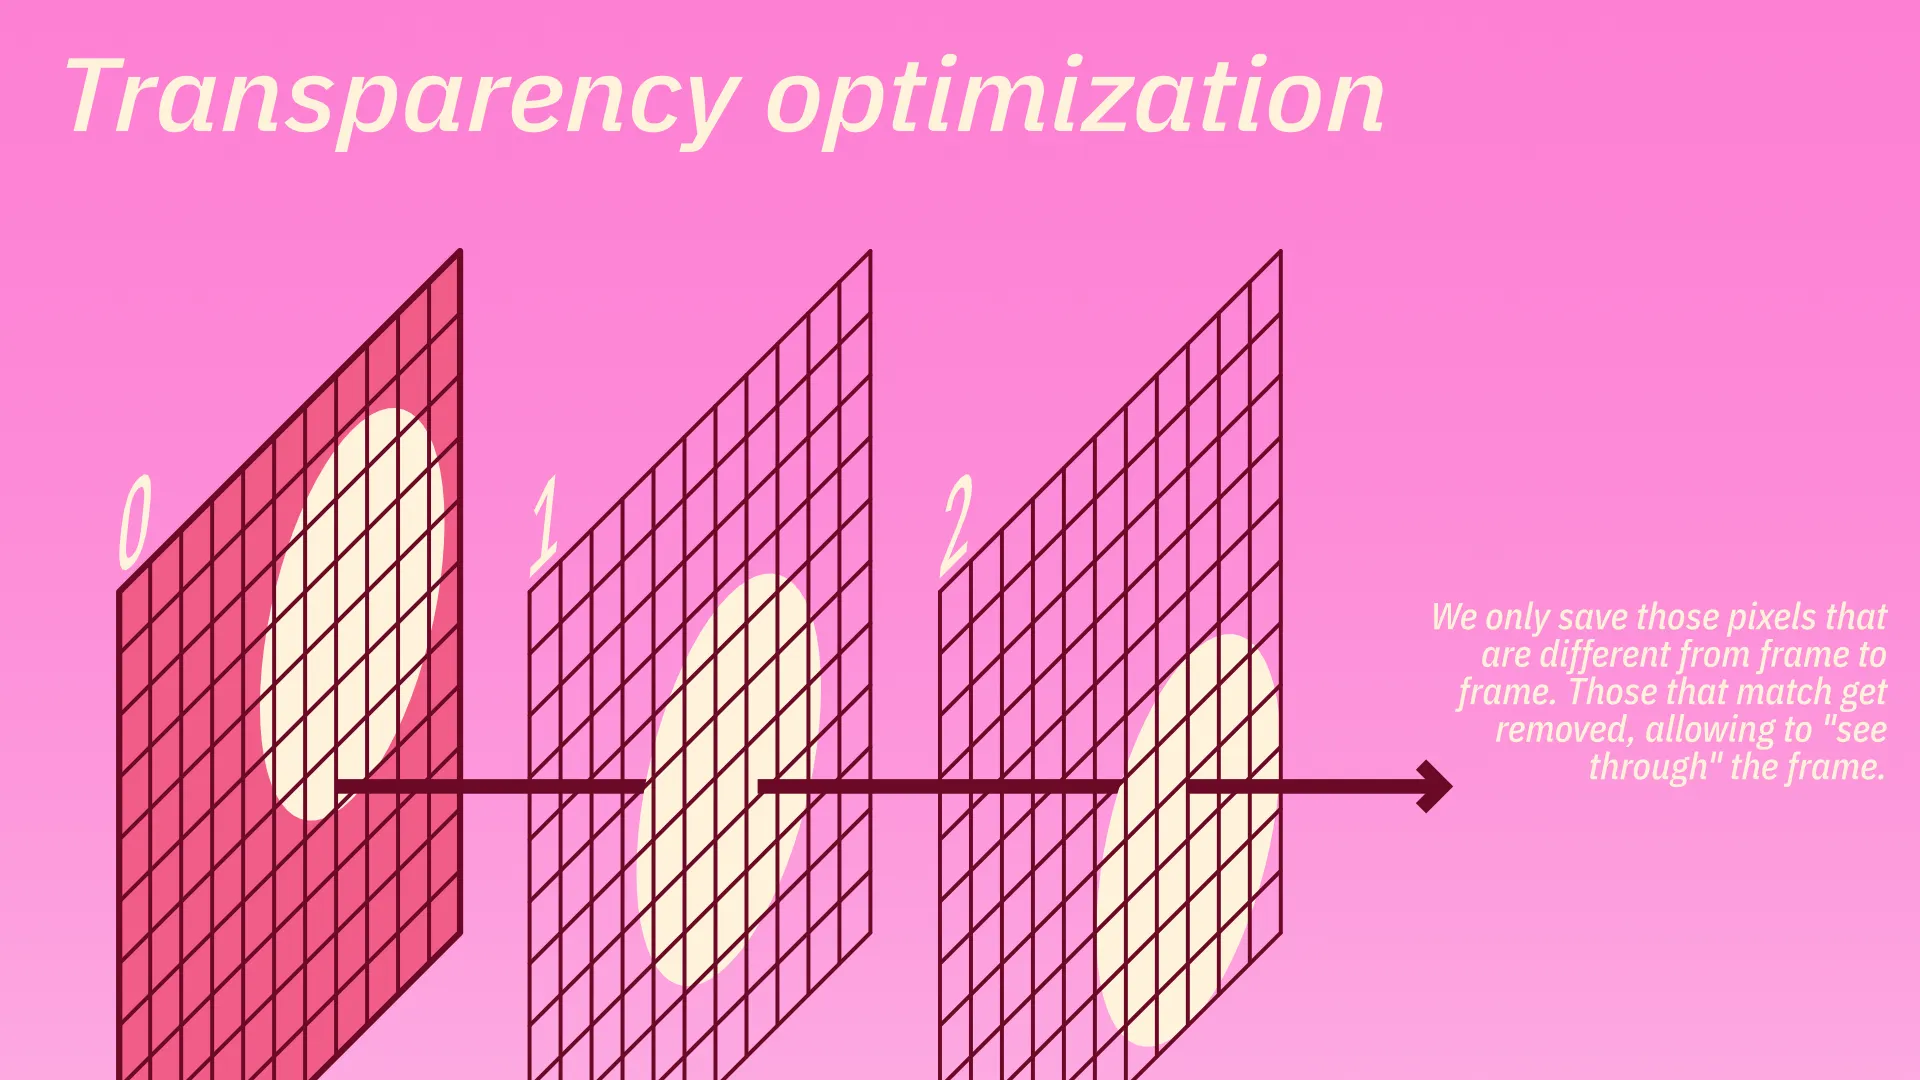
One of the most common tricks is ✨transparency optimization✨, which aims to only write what’s different from frame to frame, and leave as transparent whatever did not change.
Essentially, we are digging holes into every frame if the last one had sections that match exactly. This way, we kinda see through this frame into the last frame, because those holes are transparent colors.
To do this, we make the difference between every pair of frames and mark the pixel indices where there’s a match. Then, we’ll color this matches with a special color from the palette that we’ll use to make holes. This can be absolutely any color.
Finally, we’ll tell the encoder that whenever it finds this particular index in any frame, just smash it and make a hole there. This special color should not match with any other in the palette, so it’s usually artificially generated.
This way, if we have a static background in our animation, this background will only be encoded once in the first frame. All the subsequent frames will have huge holes that let you see through the animation. This decreases the file size by a ton. Sick af in my opinion.
Conclusion
So, to recap:
Gather every frame from your animation
Generate a global palette
Apply the palette to every frame
Smash holes wherever applies
Encode each frame
Enjoy!
What it’s described here is by no means the standard way of doing this but just all the decisions and choices I had to make in order to implement the saveGif() function for the p5.js library.
As I said in the beginning, the GIF specification only tells you how to write all the frames at low level, with block management and all that stuff. But it does not tell you how those frames should look like or what you can do to make them either look better, be smaller or (hopefully) both. So this article was aimed to explore at some of the solutions needed in those aspects.
By the end of this 2022 summer the PR with all the changes should’ve been approved and merged, meaning this functionality would be available for everyone to use.
That’s it! Now go touch some grass or, at least, watch some grass GIFs.